Adding a user in your website is a simple task, but it requires attention to some details.
To add a new user in your website, follow these steps:
Logged in to Website Creator as Administrator
You need to be a administrator to make this
OPS: You need to be a administrator to make this
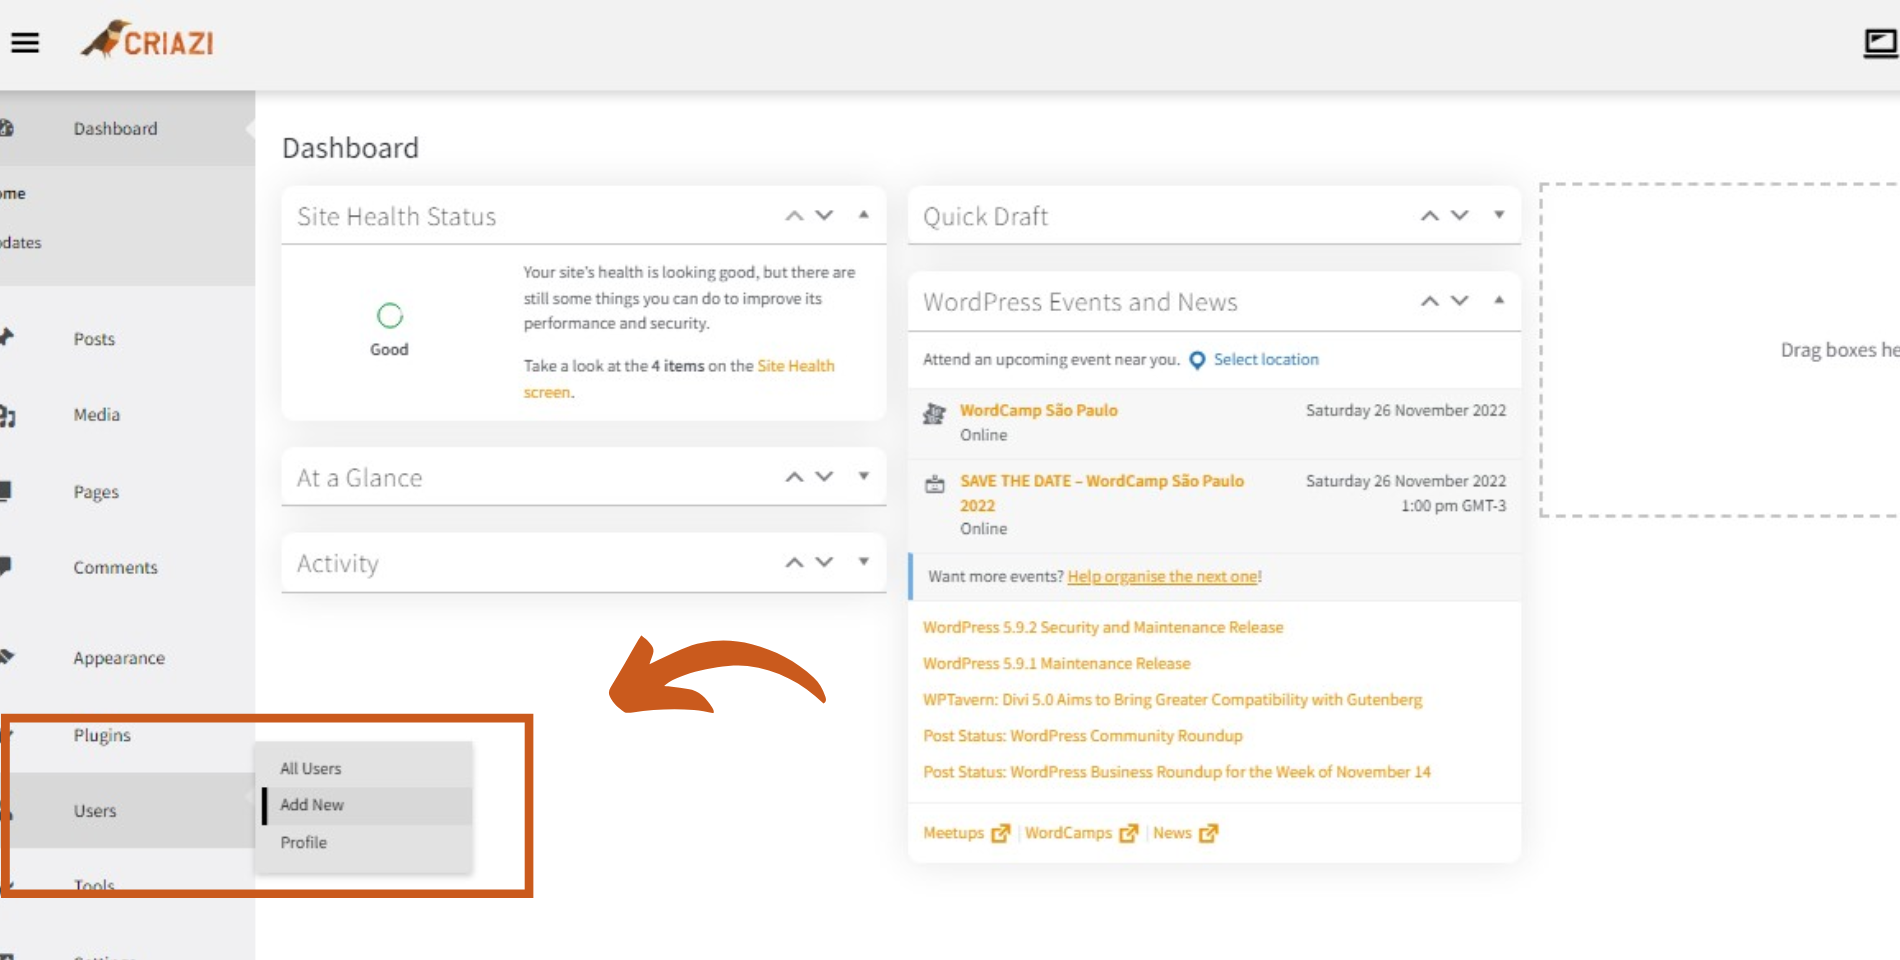
1. Access the user creation screen
Click on the Users menu > Add New.

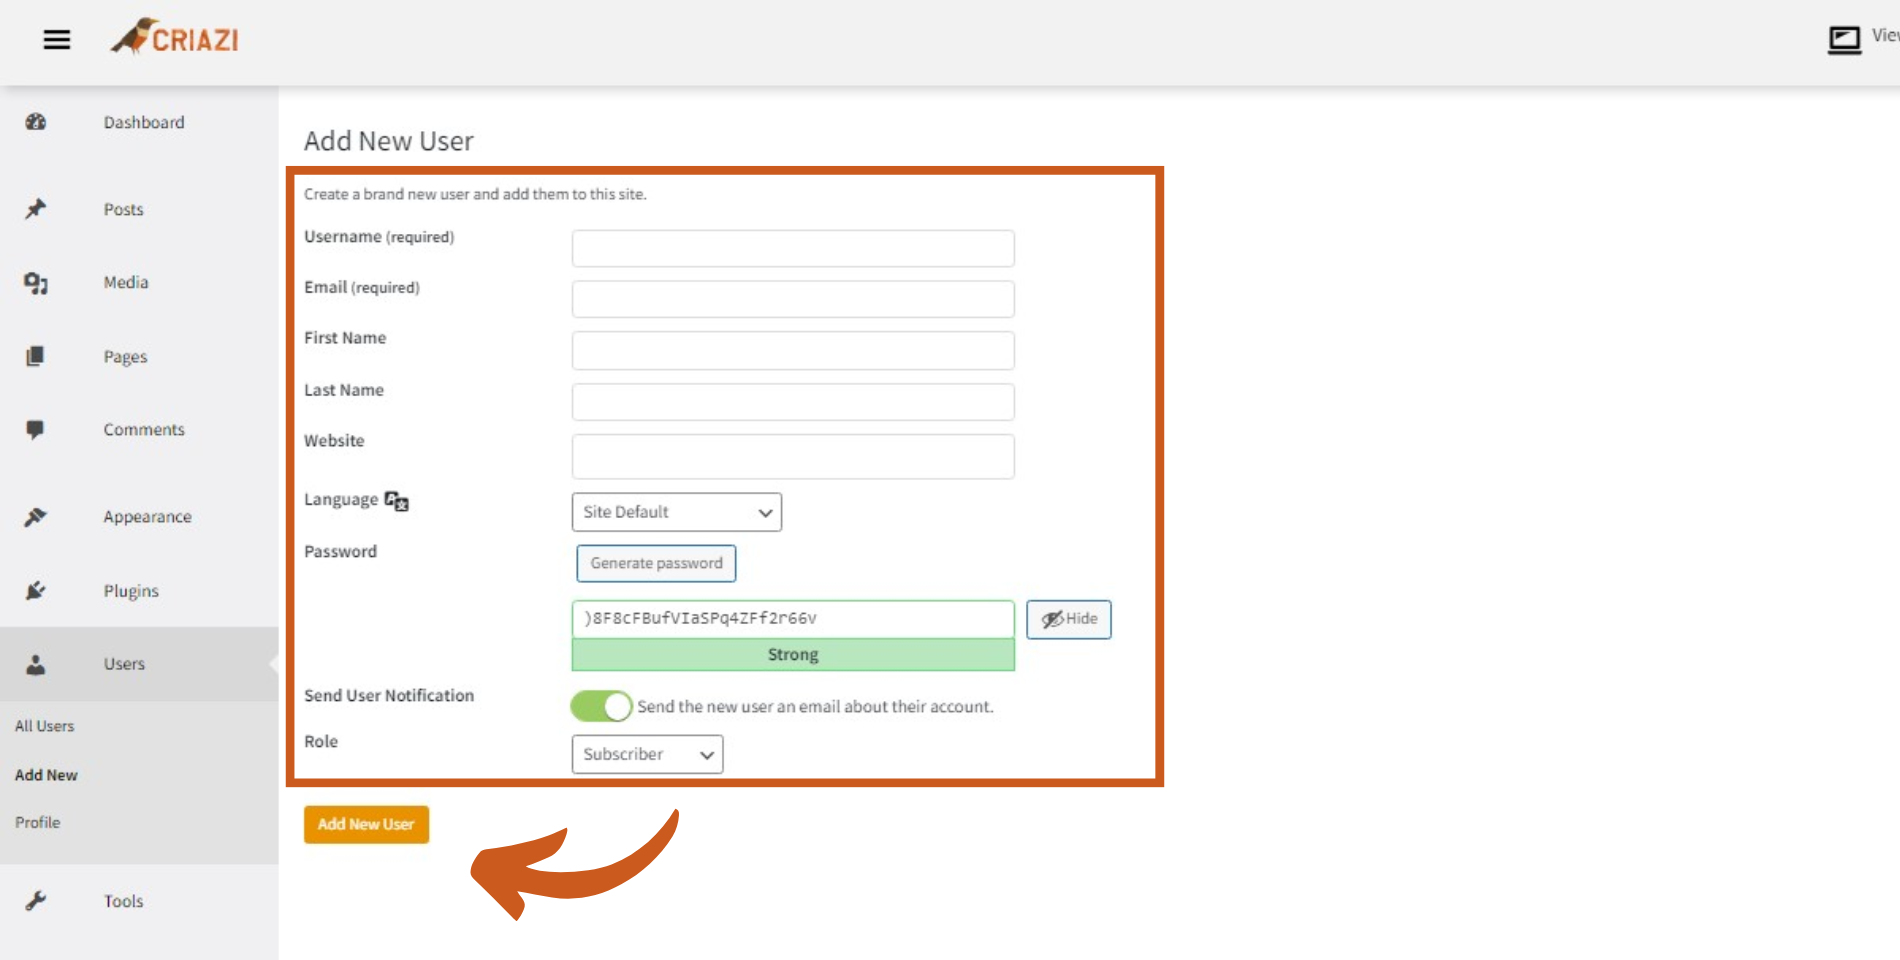
2. Fill in the new user information
Fill in the Username and Email fields. The other fields are optional. We recommend that you properly fill in all available fields.
You can choose a new password for this user by clicking the Show password button. Otherwise, a password will be generated automatically. Note that Website Creator encourages you to create a strong password (difficult to guess), so if you use a weak password you should check the option Confirm weak password usage to proceed.

Now time for you choose what permission you want for that user:
Administrator: Has all rights over all functions of the site. (Ideal for Site Administrator, and Development Team – Create a User for Each)
Editor: It can create and edit other users’ posts, pages and messages. That is, the editor can control the posts created by him and those created by other users. (Ideal for the principal or school website manager)
Author: The author can create and publish the posts created by him. (Ideal for teachers and content contributors)
Contributor: The contributor creates the posts but cannot publish them. The post can only be approved with approval from an editor or an admin. (Ideal for assistants or teachers new to the platform)
Subscriber: The subscriber is the last level of the hierarchy. He can only make changes to your profile. (Ideal for students and enthusiasts)
Choose the most suitable role for your user.
Save the new user
Click on the Add new user button to finish creating it.


